Sunday, December 22, 2013

My Interview With IMAGINiT at AU 2013

Hi everyone. During my trip to AU, I managed to get a video interview with Kevin Breslin from IMAGINiT Technologies. This was actually my first video interview I've ever done, so I was very nervous at the beginning. I want to thank Kevin, Cait, IMAGINiT Technologies and Advantis Comm. for their time and help making this video happen. I had a great time and experience making the video and mingle with the group.

If you don't know who IMAGINiT Technologies is, they are the worlds largest provider of enterprise solutions to the engineering community. They have 40 offices throughout North America and Asia Pacific. They are currently our Autodesk reseller at our firm, providing support, implementation services, data & facility management, consultant services, and training in varies formats.

Anyways, here is my video interview. Enjoy.

Tuesday, December 17, 2013

My AU 2013 - Part 1

Wow what a crazy busy week it has been since my return from AU.  What a great experience I had AU 2013. I had the privilege to mingle with designers, technicians, architects, mechanical & civil engineers, instructors and managers from all over the world. It’ always great hearing stories from other firms about their design workflows, company standards, networking, software implementation and collaboration. Anyways, the Venetian hotel is one amazing hotel. If you have never been here, I would recommended added this place on your listed to do if you are ever visiting in Vegas.

AU 2013 had a record setting attendance of over 9,272 members representing 74 different countries. In addition, AU online had 35,000 online participants. WOW! On top of that, members were able to choose from 700 different labs & classes.  

Embedded image permalink

Monday: Day 1

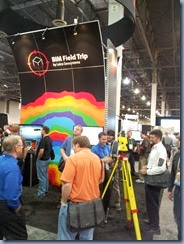
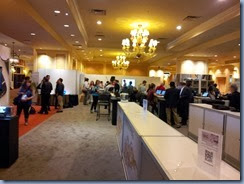
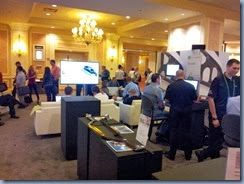
The first day of AU kicked off with a quick stop at the registration center to get my badge and sweet AU bag. Afterwards, I attended a with private roundtable discussion meetings with Autodesk members. I later then attended the Infrastructure Symposium. The Infrastructure Symposium consisted of 4 separate sessions: General Session, Transportation Customer Presentations, Transforming Workflows in Infrastructure, Transportation and Wet Infrastructure-Design and Model on Steroids. Afterwards everyone was invited to the Networking reception for food & drinks and a chance for everyone to mingle with other engineers and designers from all over the world.  Here are a pictures I took that day below.


20131202_14195320131202_13172220131202_13154120131202_07535120131202_16251720131202_16034320131202_143659 20131202_12493420131202_124339

Tuesday: Day 2

After having breakfast, the first set of classes kicked off. Walking down the main hallways, it was apparent this years attendance was going to be large also.  Throughout the day, I attended a few private roundtable meetings on several software platforms. In addition, I also attended a few InfraWorks classes which turned out to be very interesting. The opening keynote address was also today. I was lucky enough to sit close, to get a good view of the stage. The keynote address started off with a bang with Penn & Teller opening comedy skit. This was actually the first time I have ever watched them live. It was pretty entertaining. After about an 45 minutes of some amazing new Autodesk software presentations we were later surprised again with a live robotic presentation. I was actually just 20 feet from this machine. It was pretty amazing how far we have come with technology. Later that evening, all 9,000 of us were waiting anxiously outside the exhibit hall waiting for the doors to open. It looking like black Friday in front of Best Buy lol. We were all packed in down the main hallways. Things got more interesting when one of the fire alarms went off. After about an hour the doors opens and everyone made a mad rush in to see all the latest design software and toys. The Exhibit hall had everything you could possible think of from plotters, touch screen design TV’s, 3D printing machines, computer workstations, network solutions companies, varies training companies, and many many design software companies. Anyways, I have posted several pictures from events that day. I did have the opportunity to take a picture with Shaan Hurley from Between The Lines. I have also posted a link of the Keynote Address if you wish to watch it. Anyways, I will try to post part 2 later this week. Thanks for stopping by.


KEYNOTE ADDRESS

20131203_19450020131203_19413220131203_15483220131203_15001620131203_13184720131203_10215520131203_10190020131203_10104120131203_09430220131203_19282120131203_19281020131203_15483820131203_13183120131203_11424520131203_094302

Sunday, December 1, 2013

EXPERIENCE AU ONLINE

11-21-2013 1-11-40 PM


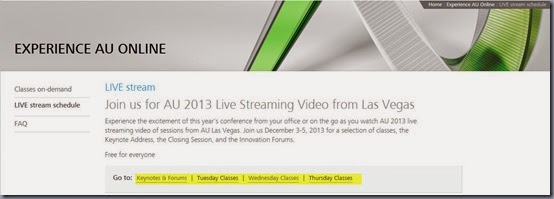
Good morning everyone. Now that AU is just 2 days away, I would like to provide some links to those not able to attend AU.  I have listed below several links for several social sites that you can follow covering AU 2013.  The Autodesk University website provides links to watch the opening keynote address and several classes that you watch live throughout the week. In addition, you can also follow AU with LinkedIn, Twitter and Facebook to see comments, videos and pictures being posted. On top of that, you can also follow me on Google+ and Twitter as I post live pictures from classes, roundtable discussions, video interviews, exhibit hall, AUGI Beer Fest, Social Media and much more. I will try to post at the end of each night my experiences of that day on here. Anyways, I am definitely excited about the trip. What surprises does AU have for us this year?? Smile  Stay tune.


Autodesk University 2013 Live

LinkedIn - AU Group

Twitter - AU 2013

Facebook - AU 2013

Tuesday, November 19, 2013

Autodesk Vehicle Tracking 2014

Every project we work on, whether you are an architect or engineer,  we perform some type of design analysis to ensure our design meets local, state, or federal construction standards. In Civil 3D, we can perform slope, grading, sight distance, drainage and hydraulic, road vertical analysis and much more. Now with the new addition of Autodesk Vehicle Tracking 2014 software, we can now add vehicle swept path analysis to the list. 

Just early last week, Autodesk introduced the new Autodesk Vehicle Tracking 2014  (formally known as Auto Track) software to the world. This software was acquired by Autodesk from Savoy Computing Services in August.  Autodesk Vehicle Tracking software performs transportation analysis for vehicle swept path. In addition, it also provides design solution for vehicle movements in areas such as parking lots. The software also allows you to evaluate steering  movements for light rail vehicles and aircrafts. Last but not least, Autodesk Vehicle Tracking can assist in designing parking lots and road intersections such as roundabout. Another positive note about the software is that it is fully integrated into Autodesk software such as AutoCAD, AutoCAD Civil 3D, AutoCAD Plant 3D, AutoCAD Map 3D and AutoCAD Utility Design software. With capabilities of 3D modeling, performing vertical clearance, vertical grades and crossfalls, this software can help designers and civil engineers optimize their design faster.

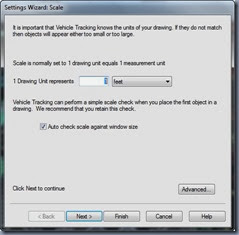
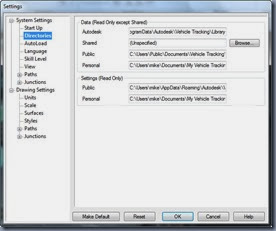
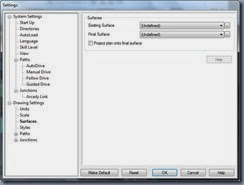
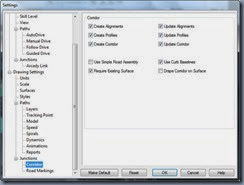
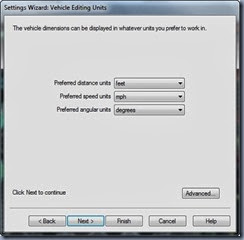
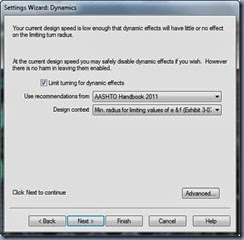
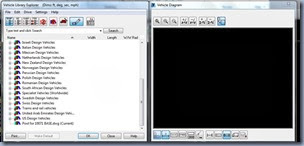
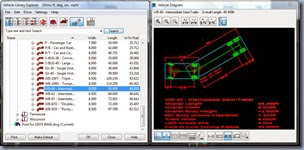
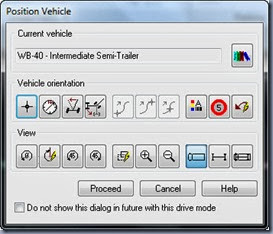
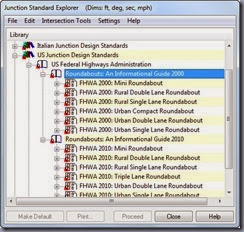
 I have provided several screenshots of the numerous setting and features that comes with this software. Enjoy


11-16-2013 10-37-48 PM

The Vehicle Tracking Ribbon

11-16-2013 10-41-14 PM

Settings

11-16-2013 10-42-04 PM 11-16-2013 10-43-24 PM

11-16-2013 10-49-48 PM 11-16-2013 10-50-37 PM

11-16-2013 10-51-46 PM  11-16-2013 10-52-38 PM

Vehicle Library

11-16-2013 10-53-32 PM 11-16-2013 10-54-20 PM

Roundabout standards and Vehicle Positioning

11-16-2013 11-00-45 PM 11-16-2013 11-25-15 PM

Video: Autodesk Vehicle Tracking

Though Autodesk Vehicle Tracking is a powerful software with numerous tools it does has it’s bugs like most software, but don’t let this deter you from downloading it and taking it for a spin. See links below for known issues and documents. Thanks for stopping by and feel free to make comments. Have a great week and hopefully I will see a few of you at AU.

KNOWN ISSUES

DOCUMENTS

Monday, November 4, 2013

Creating Shapefiles from Civil 3D Parcels

Good evening everyone. In this post I would like to share a tip on how to create shapefiles from Civil 3D parcels. So far this is the only way I know how to convert parcels to shapefiles but I am sure there are other methods out there. Hopefully this will be helpful to some of you.

Before we get started we have to discuss coordinate system. We all know all firms are different and have different workflows. Some firms may create their plats in state plane and some on surface. If your plat containing your parcels was created on surface, you will have to perform a coordinate conversion or move the data once it has been import from an SDF file. In this example I will make my drawing in state plane to simplify things.

  • Open the drawing that contain the parcel data you wish to transfer.
  • Select the OUTPUT Tab on the ribbon then select Export Civil Objects to SDF.

11-4-2013 6-25-07 PM

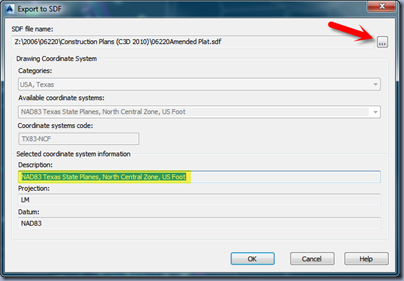
  • The Export to SDF dialog box will appear. On the first row, browse to the desire location you wish to save the SDF file and assign a name. Then set the coordinate system if not assigned.

11-4-2013 6-20-52 PM

  • Next, open a new drawing and set the same coordinate system as the file we just saved.
  • On the command line type MAPIMPORT and browse to the SDF at we just created and select OK.
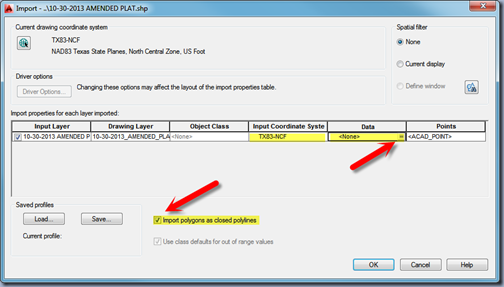
  • The import dialog box will appear. Check the Import polygon as close Polylines options. Then under the DATA column click the small selection box.

11-4-2013 6-40-02 PM

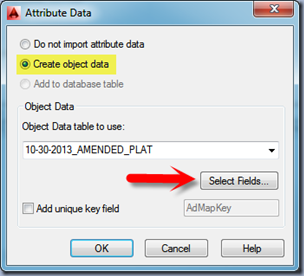
  • The Attribute Data dialog box will appear. As the default the Do not import attribute data will be selected. Select the Create Object Data. Then click on the Select Fields button.

11-4-2013 6-41-20 PM

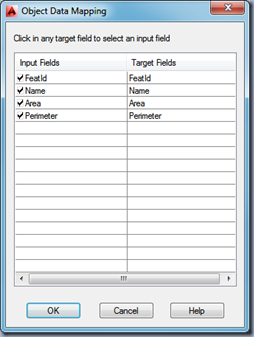
  • The Object Data Mapping dialog box will appear. For now I will select all the targeted fields and select OK twice.

11-4-2013 6-44-52 PM

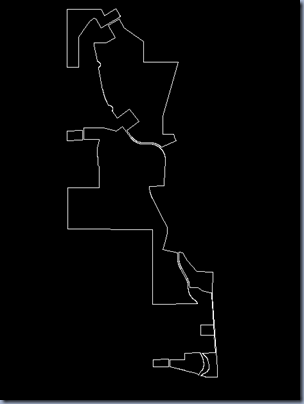
  • This will take you back to the Import dialog box. You will now see a data file under the Data column. Click OK.  All the closed parcels areas should appear in your drawing as closed polylines now. At this stage, if you drawing was not on state plane but on surface you can now move all the linework to the correct location before we export to a shapefile.

11-4-2013 6-52-25 PM

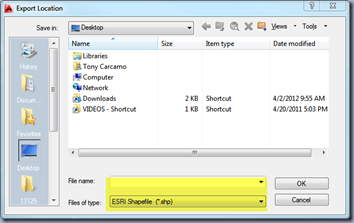
  • On the command line type MAPEXPORT. The Export Location dialog box will appear. Select a folder or create a folder that you wish to save all your GIS data for your shapefile and assign a file name. Then at the bottom under Files of Type select ESRI Shapfile (*shp.)

11-4-2013 7-17-47 PM

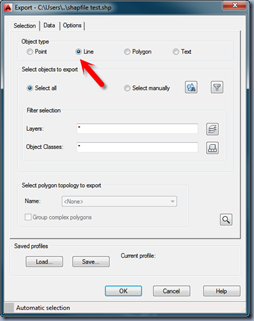
  • The Export dialog box will now appear. For the option type select Line. Under the Select Objects to Export click Select All. You can also assign a layer for all your objects.

11-4-2013 6-54-44 PM

  • Now select the DATA tab. As a default there are no attributes. Click the Select Attributes button.
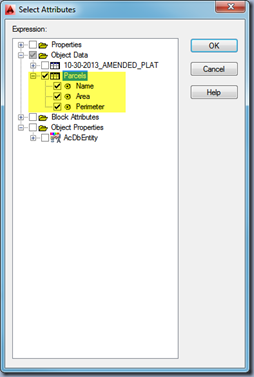
  • The Select Attributes dialog box will appear. Expand Object Data and check the Parcels options. (It may appear as the SDF file that we created) For now I will select to export everything. Click OK

11-4-2013 7-06-37 PM

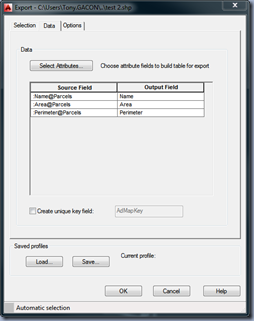
  • This will take you back to the Export dialog box. You will now see attributes in the source Fields column. Click OK

11-4-2013 7-11-47 PM

  • After a few seconds all the polylines in your drawing will be converted to shapefiles. If you look under the project folder that you assigned to save all your GIS data you will see several new files such as idx, cpg, dbf, prj, shx, and your shapefile. You will need to send all these files with your shapefile.
  • Before you send your new shapfile out the door, I would run a quick test by import the shapefile using the Data Connect feature in the Planning & Analysis workspace or the MAPIMPORT command and import the new shapefile. Then use the GEOMAP feature to ensure all the linework aligns with the aerial and appears in the correct location. Anyways I hope this information will be useful to you. Have a great week and thanks for stopping by.

Wednesday, August 21, 2013

Imaginit Google Earth Import in Civil 3D 2014

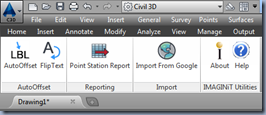
Good morning everyone. This morning I would like to share some interesting and maybe important information to a few of you. As we all know, the Google Earth extension in C3D 2012 was a power tool that most of us utilize on a daily or weekly basis. That feature was removed and replaced in the 2013 version with the Project BaseJump (Bing Map extension). The Bing Map extension was useful but there was a few draw backs with printing and saving images. Well, just recently our reseller Imaginit released a new 2014 Utility application tool that put a smile back on my face and our planners. Imaginit Utilities for Civil 3D 2014  includes the AutoOffset, Point Station Report, and last by not least, Import from Google Earth. This feature allows you to bring in aerial images (georeferenced images) and terrain tin surface or both straight into Civil 3D.

Imaginit is our reseller and subscription account holder for all of our Autodesk software. For those who have subscription thru Imaginit, the Utilities for Civil 3D 2014 is free. In addition, you can download the stand-alone or named-user versions. With the stand-alone installation, you are only allowed 10 seats. You may want to contact Imaginit if you need more. If you are interested in purchasing or finding more information about the Utilities for Civil 3D 2014 or other software click link below.

Imaginit Civil Engineering

The download and installation is quick and easy. After you have completed the installation, you will see a new Imaginit tab on the ribbon. I have provided below a short video presentation on how easy it is to import Google Earth images now. I also like to add, that you can insert as many images as you like. In order for this feature to work your drawing must have a coordinate system assign such state plane. Currently all the images are saved locally on your C drive but you can easily move and relink the images in your xref manager. I have not tested the other utility tools yet but you can contact Imaginit to get a free demo to test. Hopefully this information will be useful to a few of you. Thanks for stopping by.

8-21-2013 7-19-44 AM

8-20-2013 8-01-31 AM

Imaginit Google Earth Import